


Login to Flowmatix Account and Select Application to Integrate #
- Login to your Flowmatix account, select the Bot you want to integrate with Bitrix24.
- Now, click the ‘Integrate’ tab.
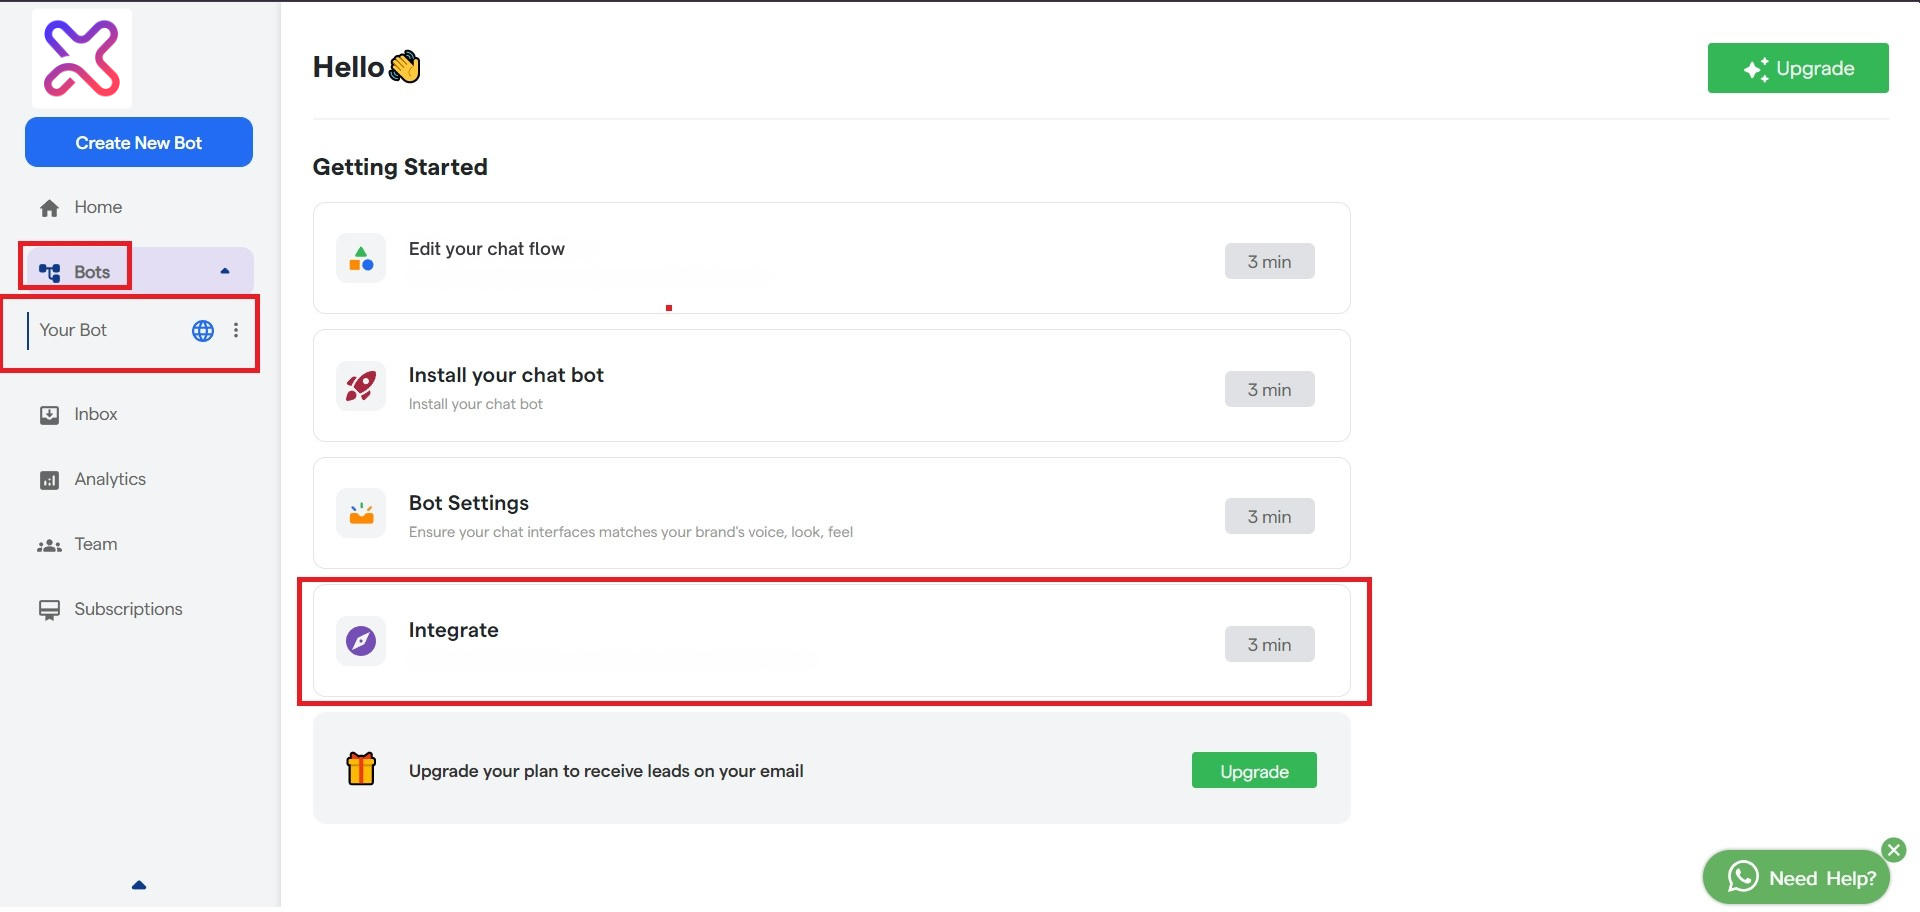
- The integrate window will open up. make sure you are in the “All Integrations Tab.”
- A list of all native integrations for Flowmatix will be available in this window.
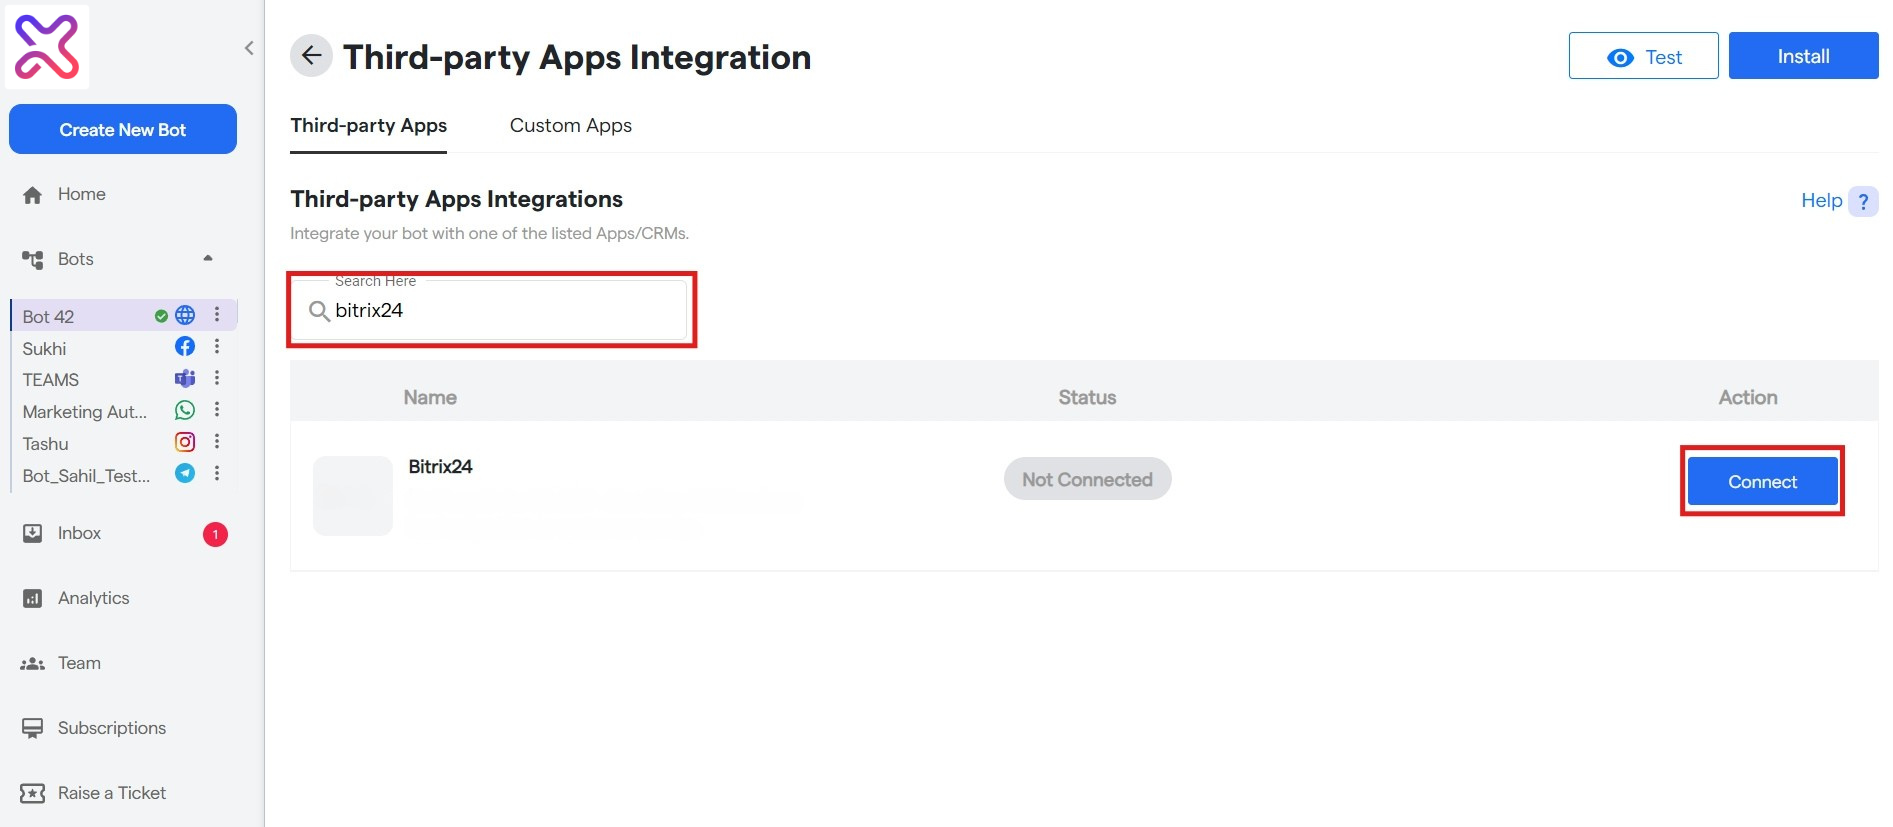
- Now find Bitrix24 by:-
- Either scrolling down the list
- Or by typing in ‘Bitrix24’ in the search box with the placeholder “search integration by name”
- Now click on the ‘connect’ button.
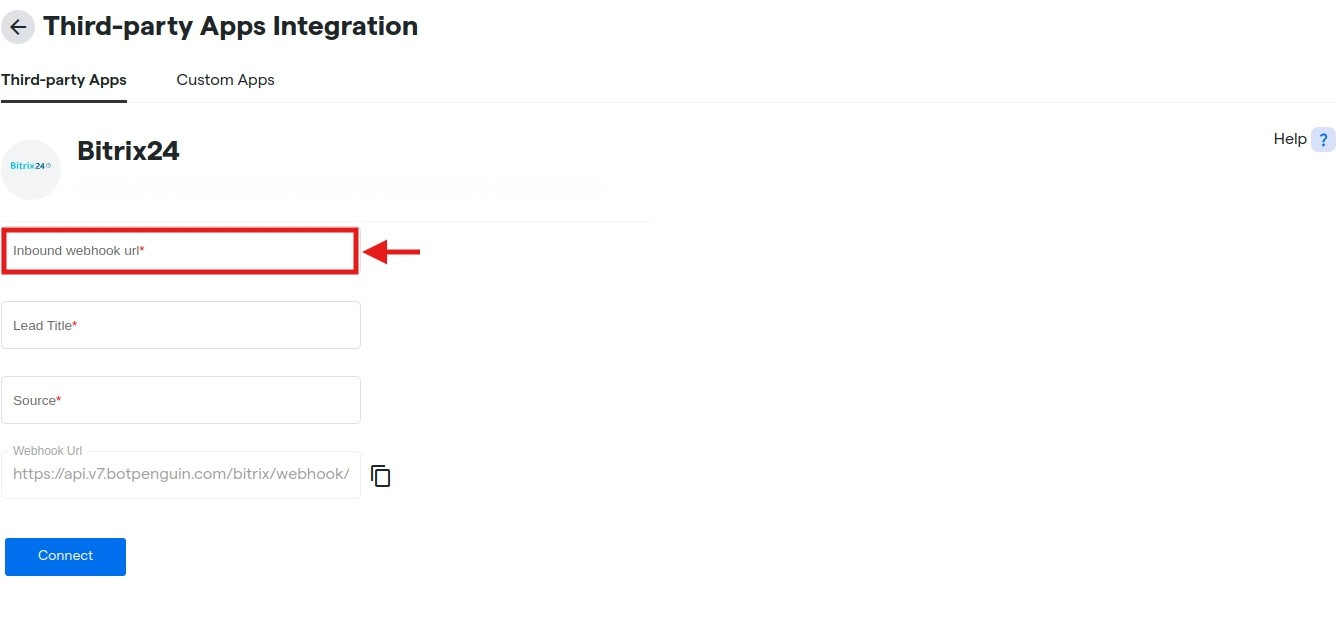
Now follow the steps further for integrating bitrix24
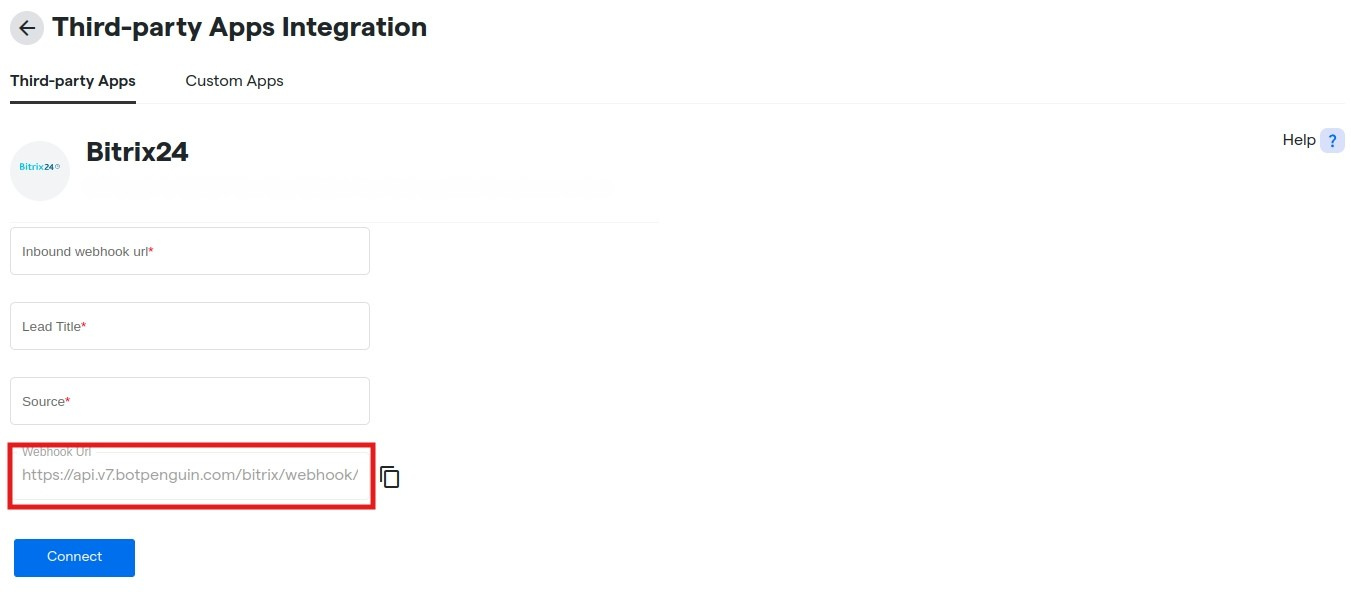
Step 1 : Go on Third-Party Apps Integration followed by Bitrix24 and provide Inbound webhook URL
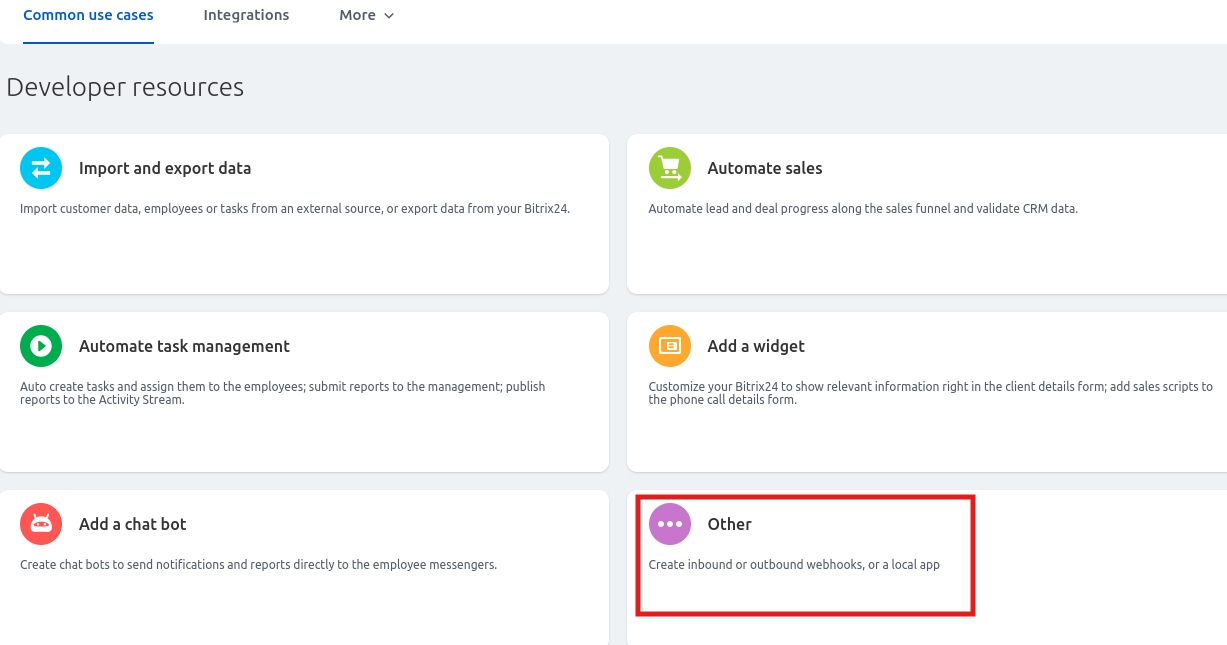
Step 2 : After opening Bitrix24 CRM, go on side bar select Applications followed by Developer
resourcs.
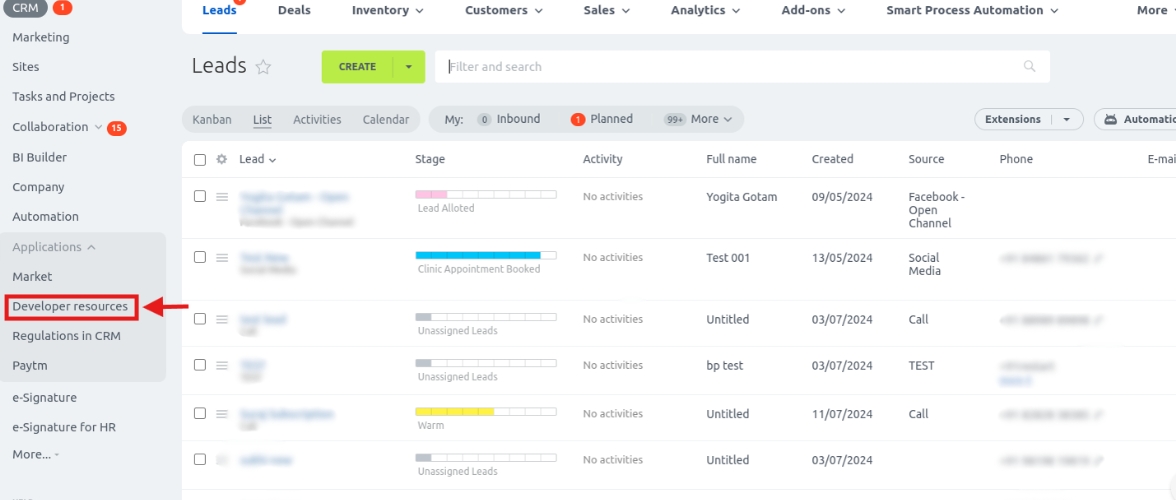
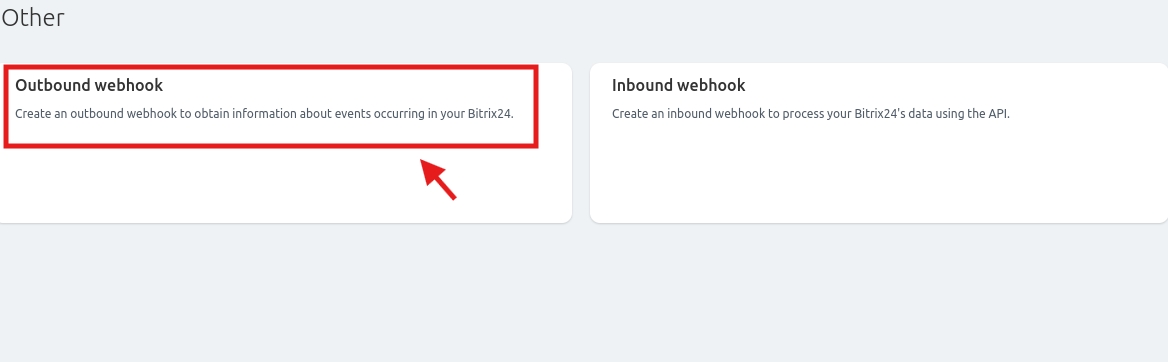
Step 3 : Select Other in Developer Resources
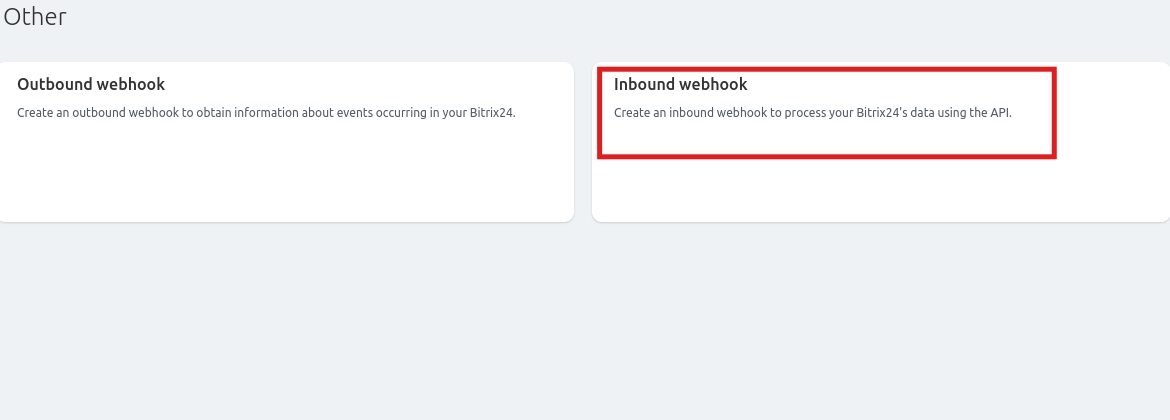
Step 4 : Select Inbound Webhook
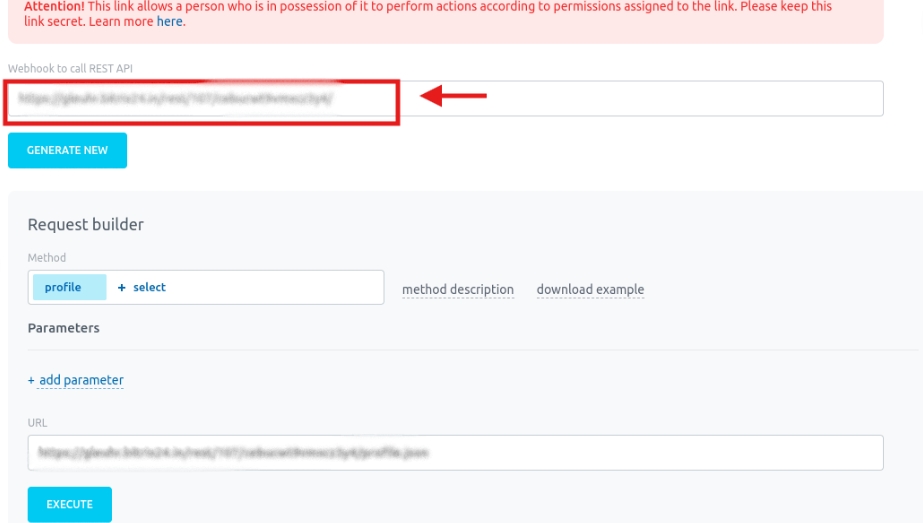
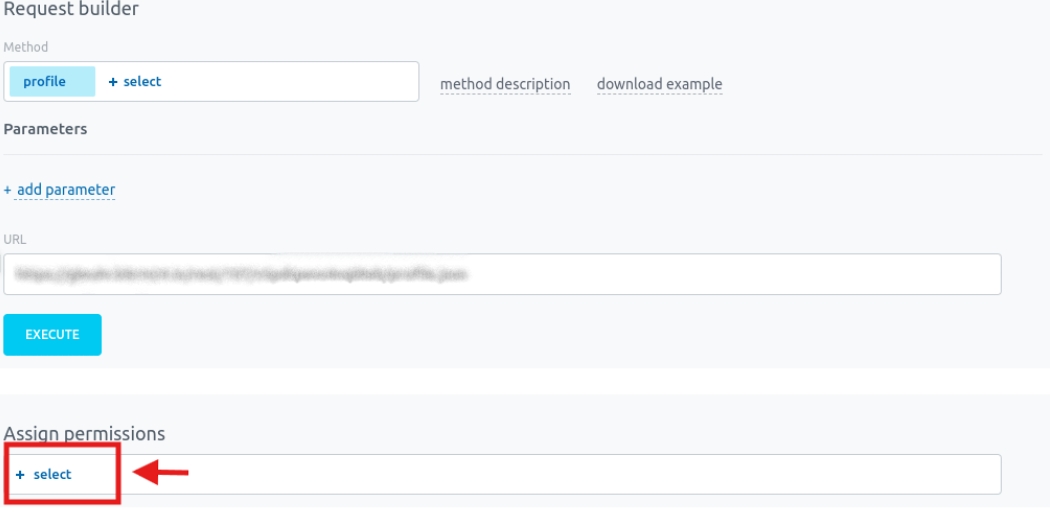
Step 5 : Scroll Down and click on Assign Permissions and copy “Webhook to call REST API”
Step 6 : Assign two permissions – 1. CRM 2. Commercial catalog
Step 7 : Go back on the Flowmatix Bitrix24 integration page and paste the URL.

Steps 8 : Copy Webhook URL
Step 9 : Go to Bitrix24 CRM then click on Applications then Developer Resources then other and
Step 10 : Paste the copied link on “Your Handler URL” and click on Events then click on + select.
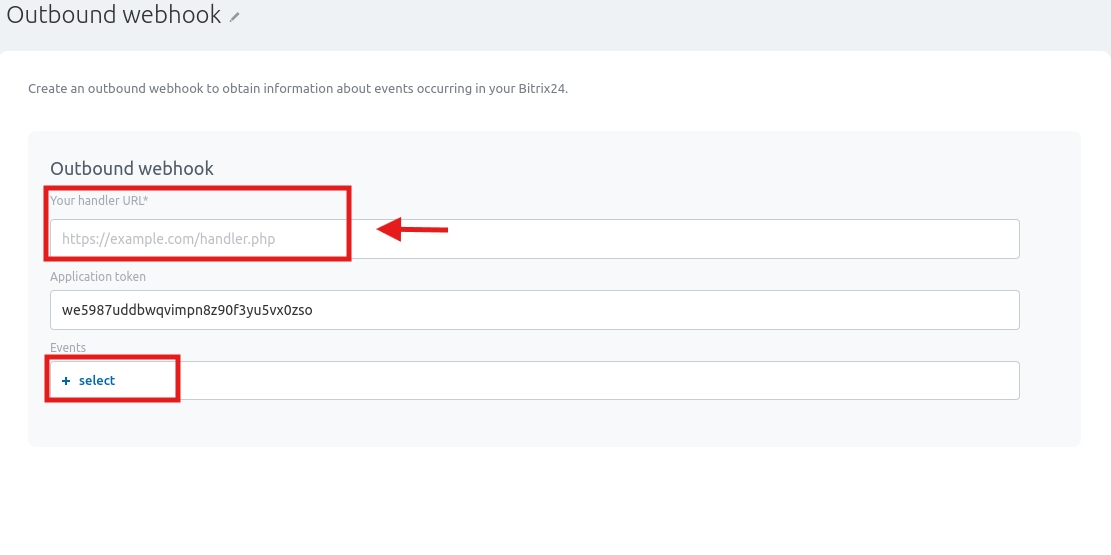
Step 11 : After clicking on “ + select” select two events –
1. Lead created (ONCRMLEADADD)
2. Lead updated (ONCRMLEADUPDATE)
After that click on save and click on connect button to connect Flowmatix with Bitrix24.
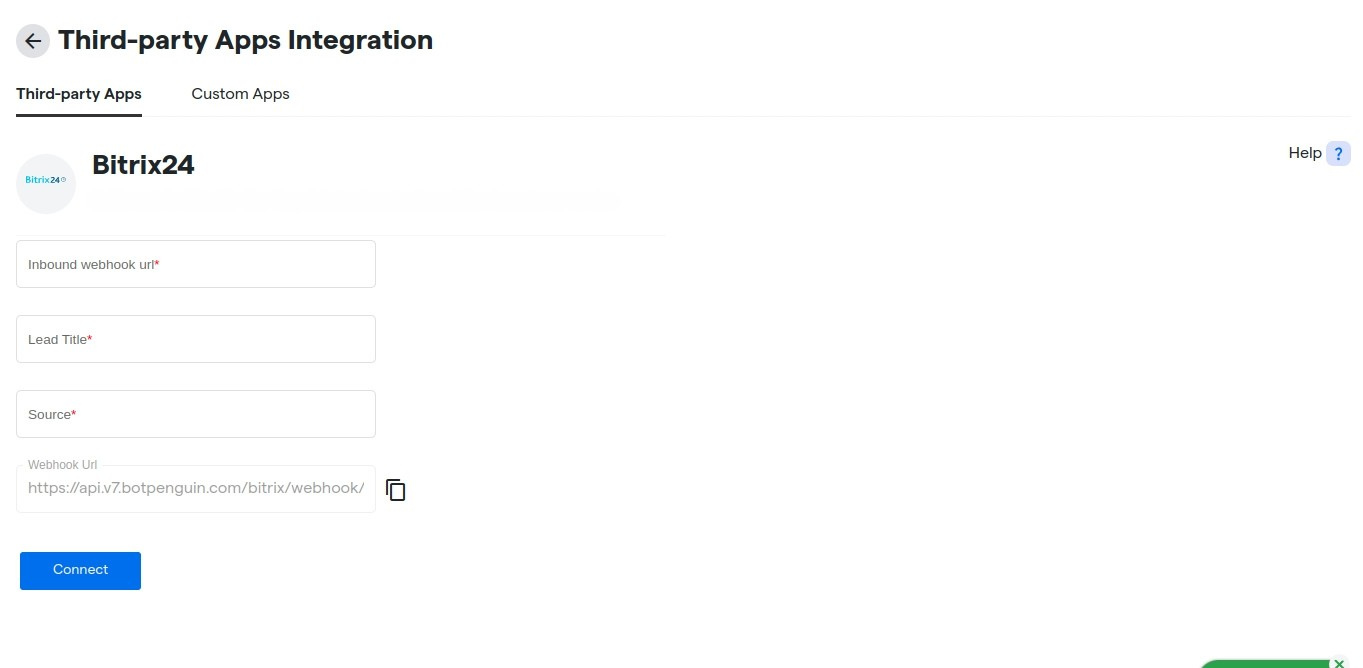
Step 12 : Now Page will look similar to this.
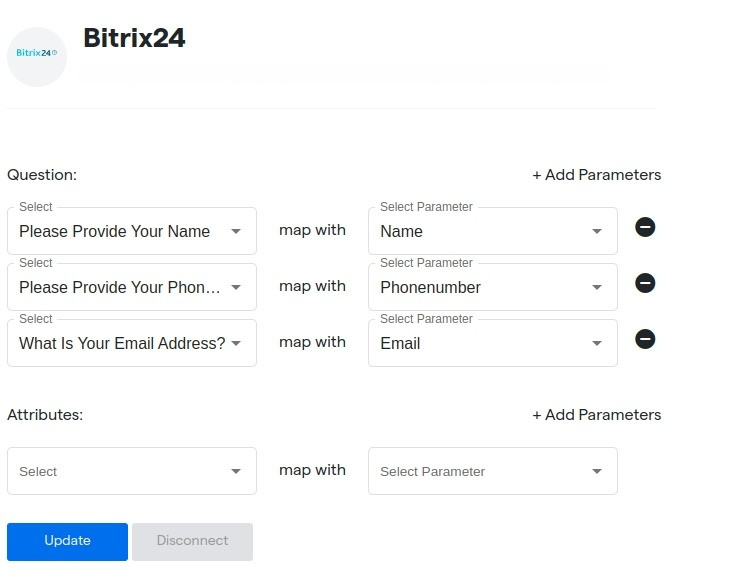
- If you want to add other parametres to the lead, then map Flowmatix attributes with lead response from bitrix24.
- Click on select parameter option, you will get the key which we get in the form of lead response from bitrix24.
- Click on select option, you will get the Flowmatix attributes on which you want to map lead response key’s values.
- Finally click on update button to save all your changes.
Steps to trigger campaign when there is any change in lead attributes in bitrix24 #
Follow these steps to set up Drip Campaign using whatsapp bot when there is any change in lead attributes in Bitrix24 CRM.
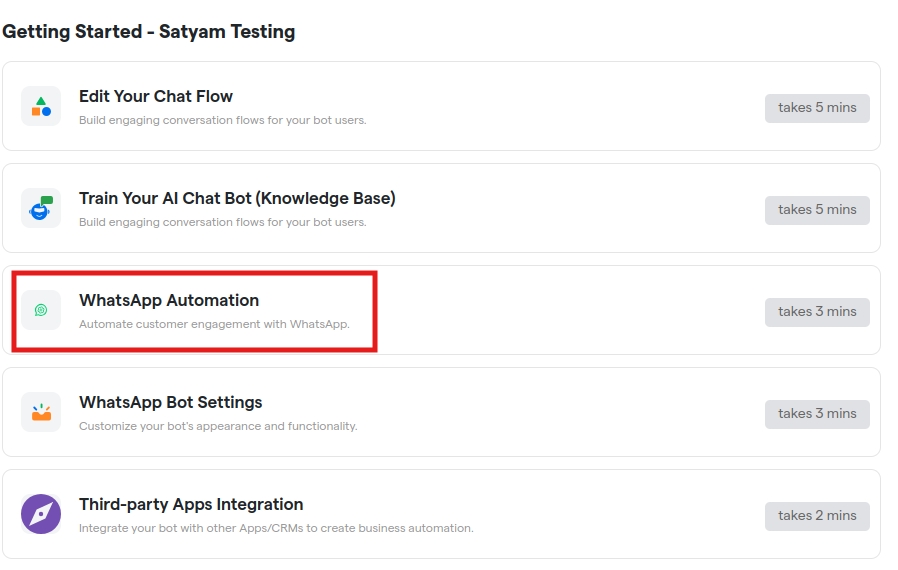
Step 1: Click on WhatsApp Automation.
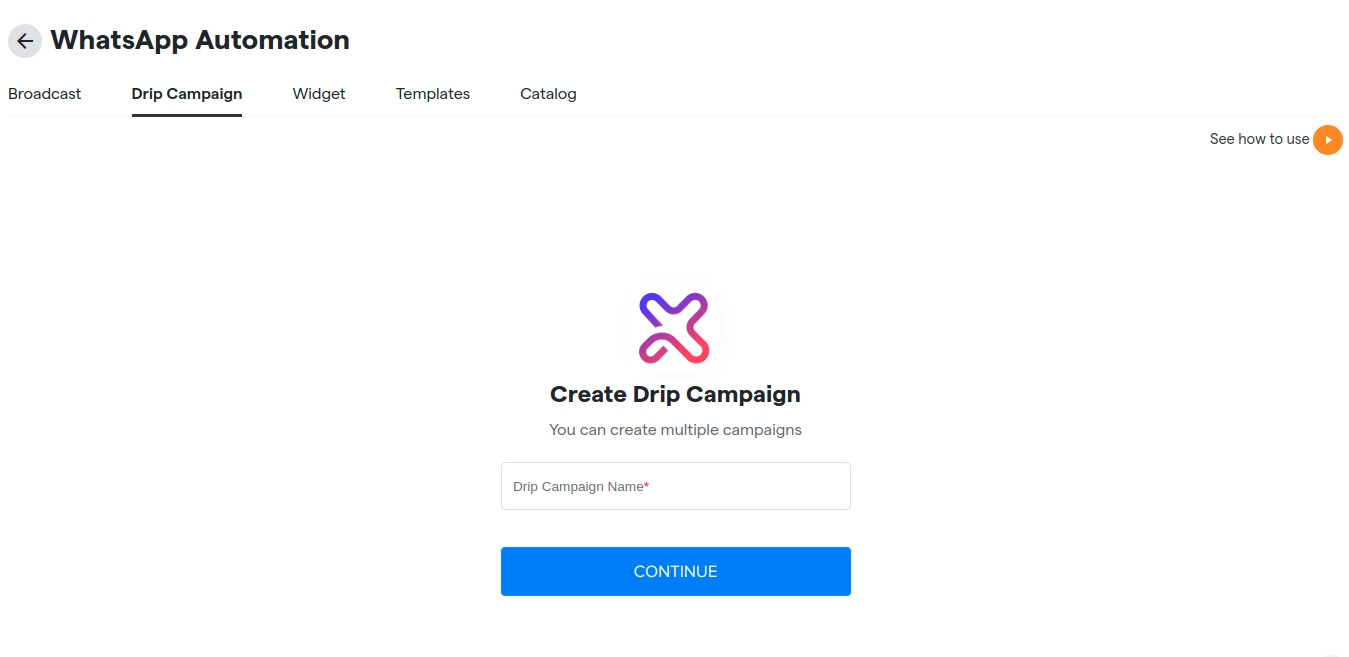
Step 2: Click on Drip Campaign option inside WhatsApp Automation.

Step 3: Name your drip campaign and then click on continue.
Step 4: Click on enrolled contacts then go on contact enrolment rules.
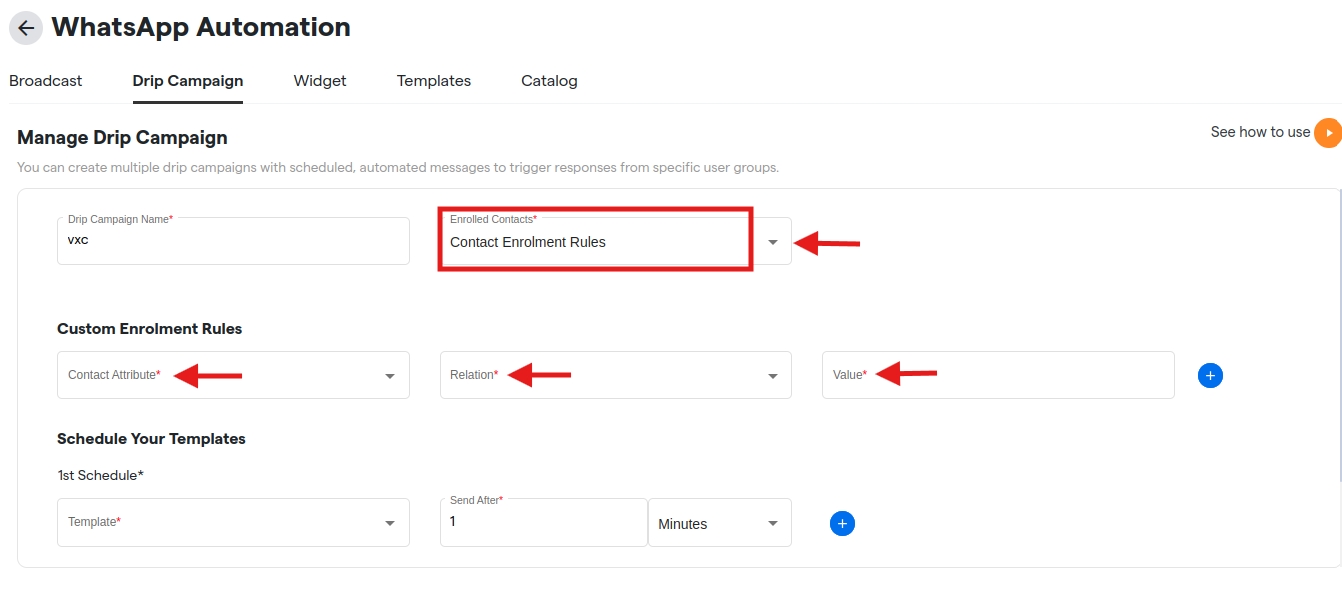
Under Custom Enrolment Values Section
- Select key for which you want to trigger drip campaign when this key value changes according to the relation set by you.
- Select which type of relation you want ”is” means equal to or ”is not” means not equal to
- Enter the value which you want to compare with the key change.
- After that select template which you want to send when drip campaign is triggered.
- Click on Create Drip Campaign
If everything is correct and you are still unable to move forward, write to us at https://flowmatix.ai/contact-us/